May 14, 2025
•
6 min read
Learn how to structure, organize and theme your new Confluence instance with Refined.
Confluence does it all. It’s a hub for news, projects, information and documentation within and across teams. You can get more stuff done faster, without leaving anyone behind. And the list of benefits goes on. But all of these good things only happen if users, well, actually use it.
The trick to boosting adoption? Make your Confluence kickass.
Kickass confluence instances are easy to use, easy to navigate, easy to maintain, useful across a variety of teams, personalized for the user, and, critically, nice to look at.
To show you how to build a kickass Confluence instance of your own, we transform gaming company Arctic Rim’s instance in seven steps using Refined.
(Full disclosure: Arctic Rim is a fake company we invented for this post (good name, right?) and its sister webinar.)
Start by creating spaces, which are homes for different types of content. You might have a space for users on a given team or a space for users working on a given project. You can have as many spaces as you want, and ideally every page in Confluence ladders up to a space so there are no orphan pages.
Common Confluence Spaces
Atlassian recommends creating ‘parent’ pages within each space to keep them from becoming disorganized content swamps full of loosely related pages. Parent pages keep spaces organized by telling users where to drop new pages—not to mention they help everyone find what they need easily, especially as the number of pages in your instance grows.
Recap:
You have spaces, parent pages and child pages worked out. Now what?
Decide what’s most important and make it stand out. You can do that two ways: on the page and around the page.
Tip: Save the custom space layout as a template to replicate it on other space homes. For max consistency, create templates for team, personal and project spaces.
What is a space layout in Confluence?
Space layouts surround all the pages in a given space. By setting up different space layouts you can customize what users see on the space and adapt them for different use cases.
You can change the space layout on a global level and on individual spaces, and you can also make templates to reuse on several spaces.
Recap:
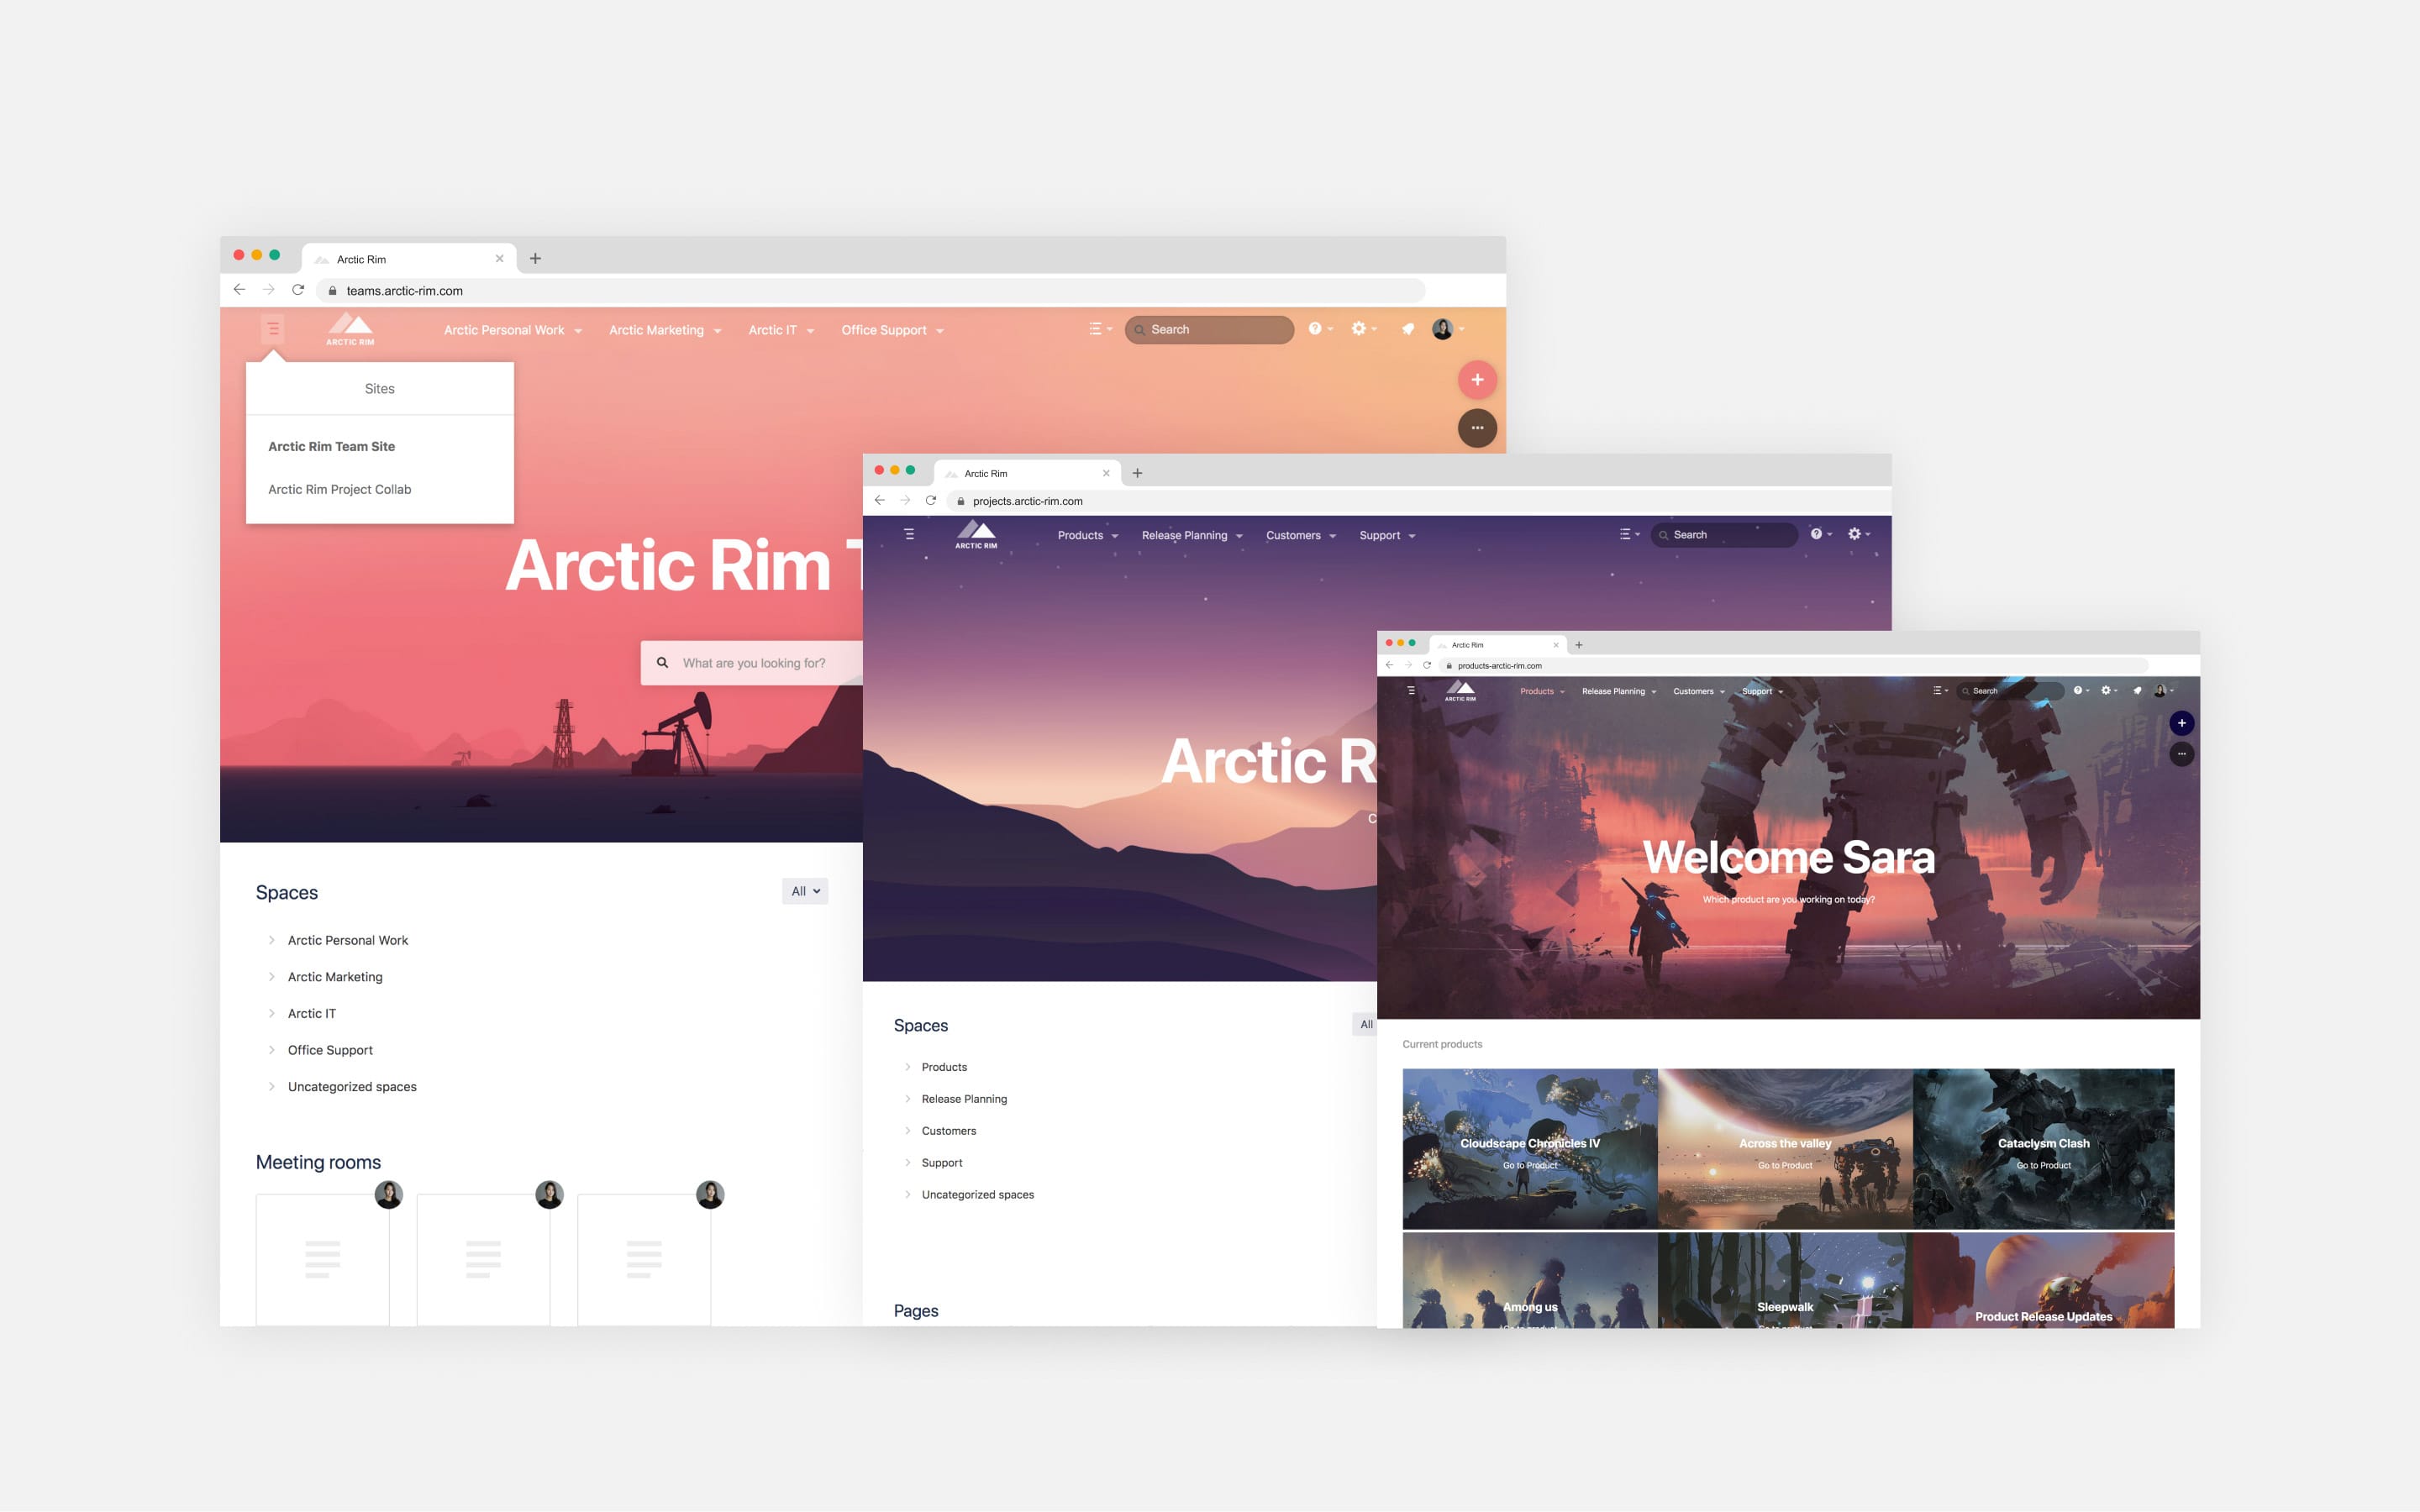
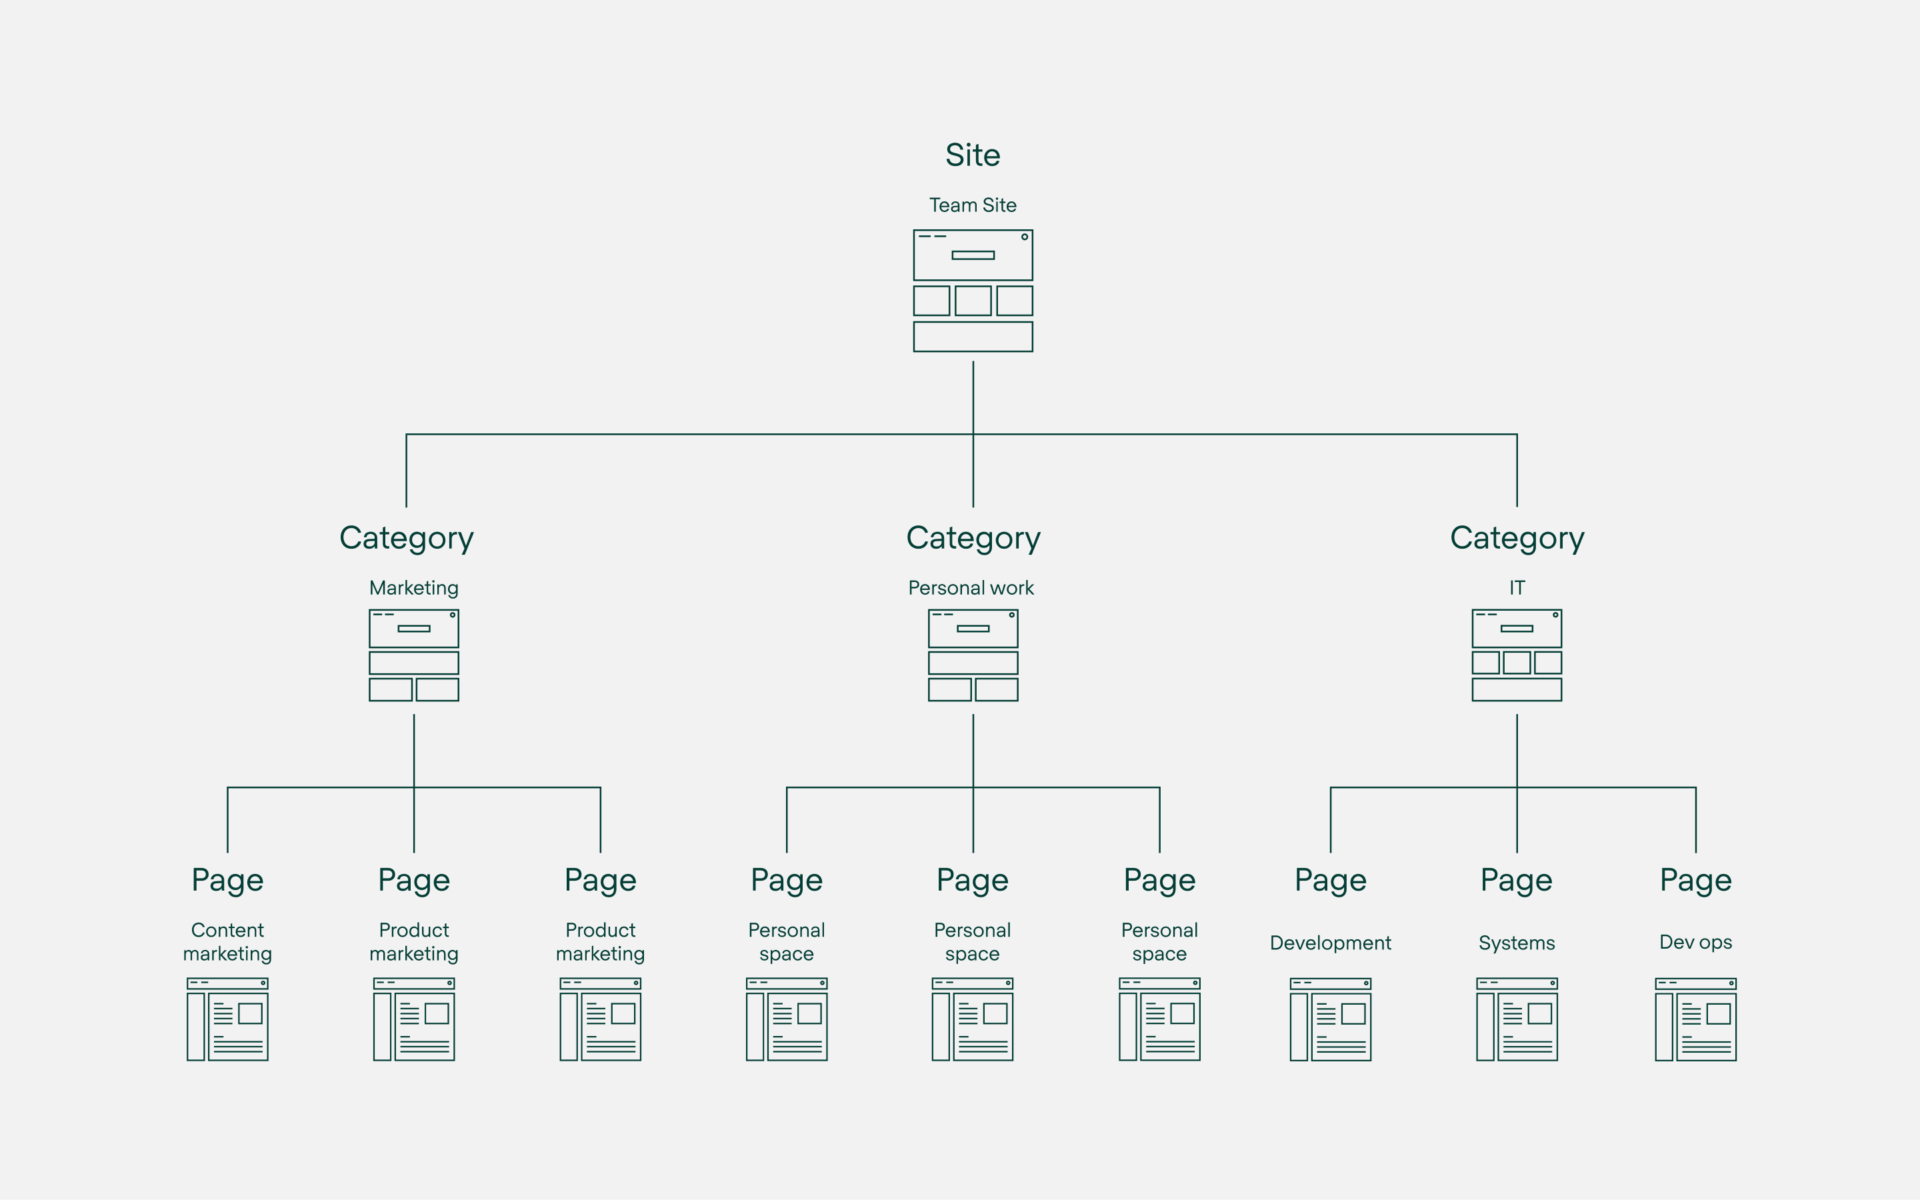
Refined allows you to organize spaces into categories, which sit in a top navigation menu on your site’s homepage. These categories can live in one Refined site or multiple (just as you can have pages and spaces appear in one site or many.) The best way to explain this step is to return to our Arctic Rim example to understand how they set up their structure.
Arctic Rim began with a bunch of spaces, which were spread throughout their Confluence. Some of these spaces fit together under a category. For instance, a dev-ops space, a development space and a systems space all fit neatly under the IT category. Content marketing, channel marketing, and product marketing spaces all fit neatly under the marketing category.
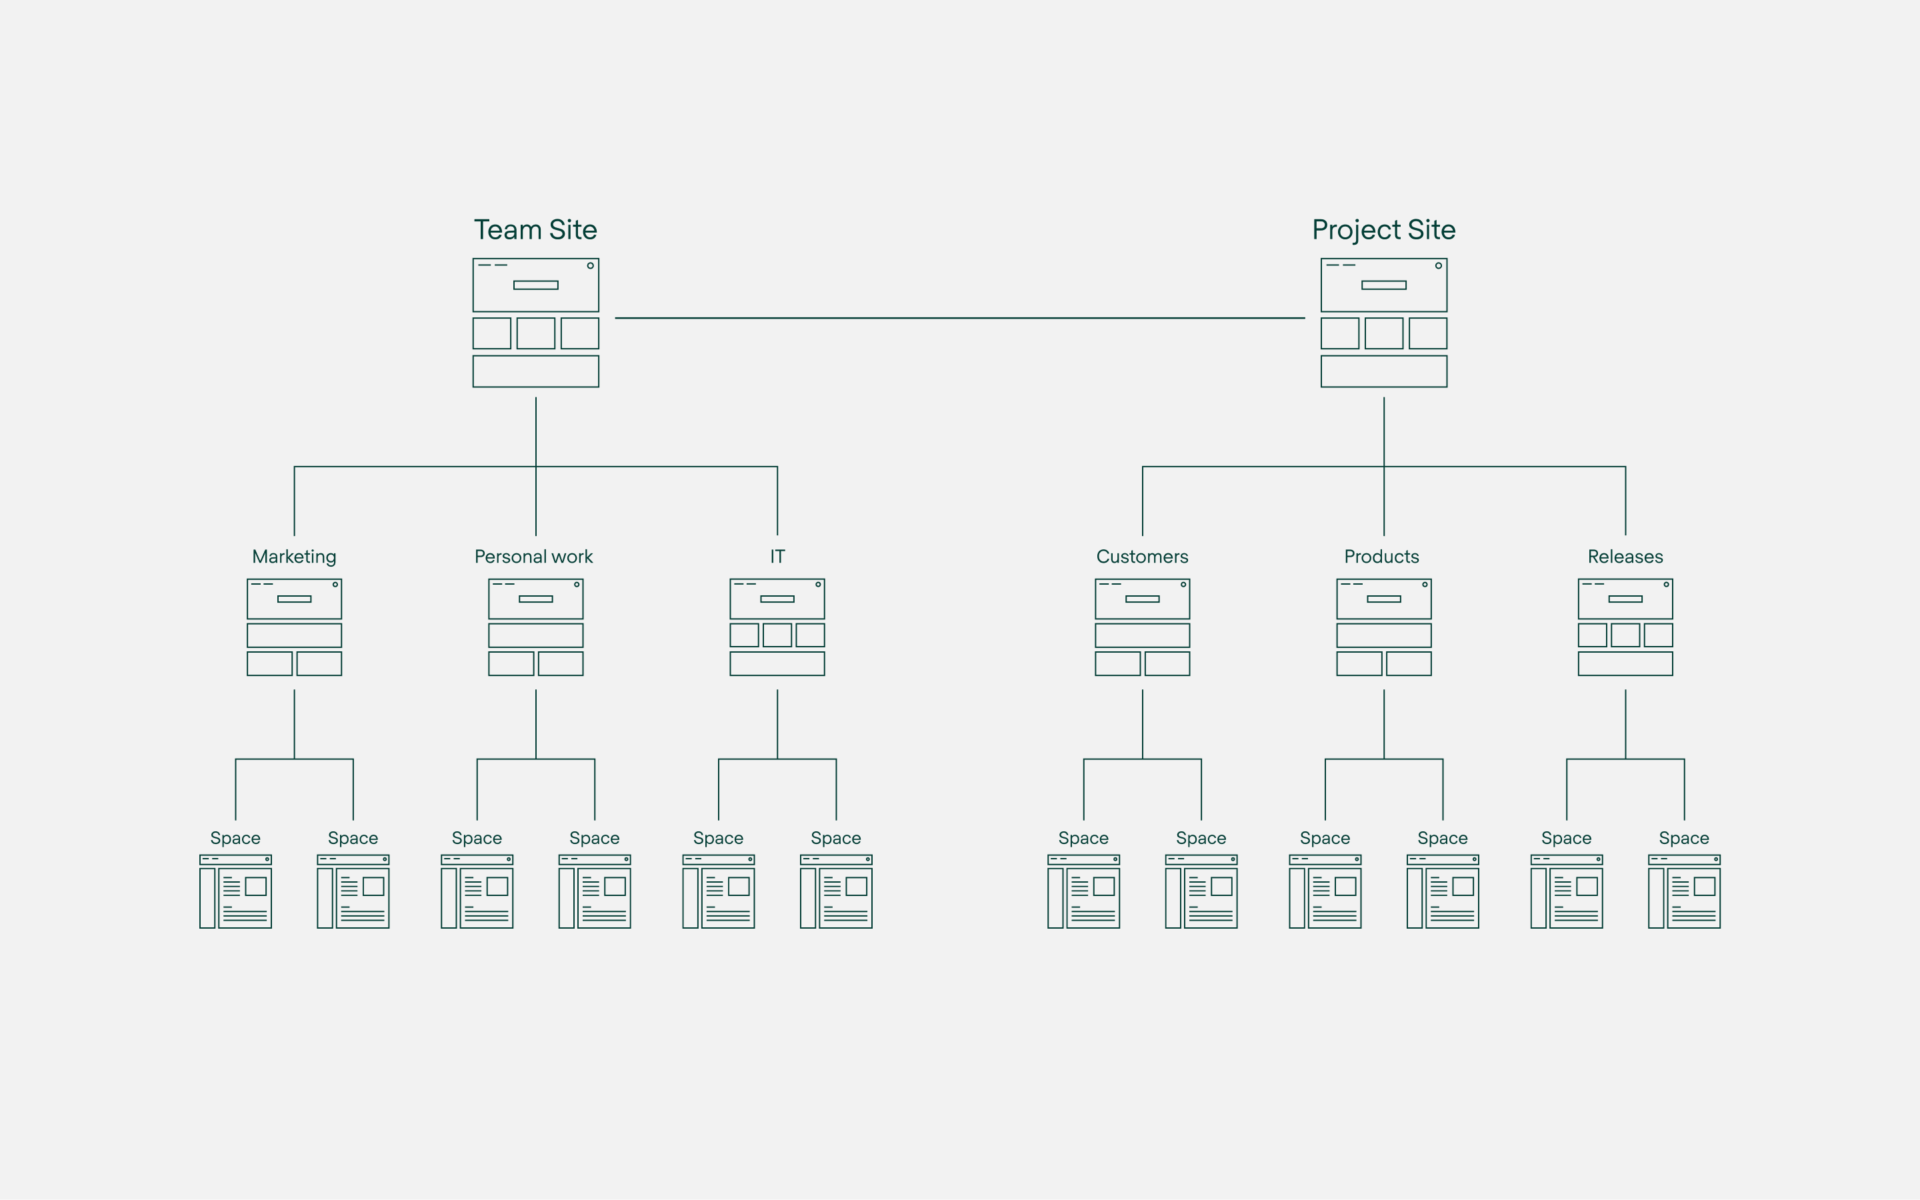
Arctic Rim also wanted a way to separate project content from personal content, so they decided to have two sites. Below you can see the structure for their second site, the project collaboration site.

In the end, Arctic Rim chose this structure for their Confluence:
Recap
Now that you’ve decided on a structure for your instance, bring it to life. Use Refined’s Site Structure to drag and drop pages into categories and categories into sites. By activating manual category permissions, admins can define who can access each site or category.
Below is a preview of how Arctic Rim built their site navigation for their team site in the Refined Site Structure.
Recap
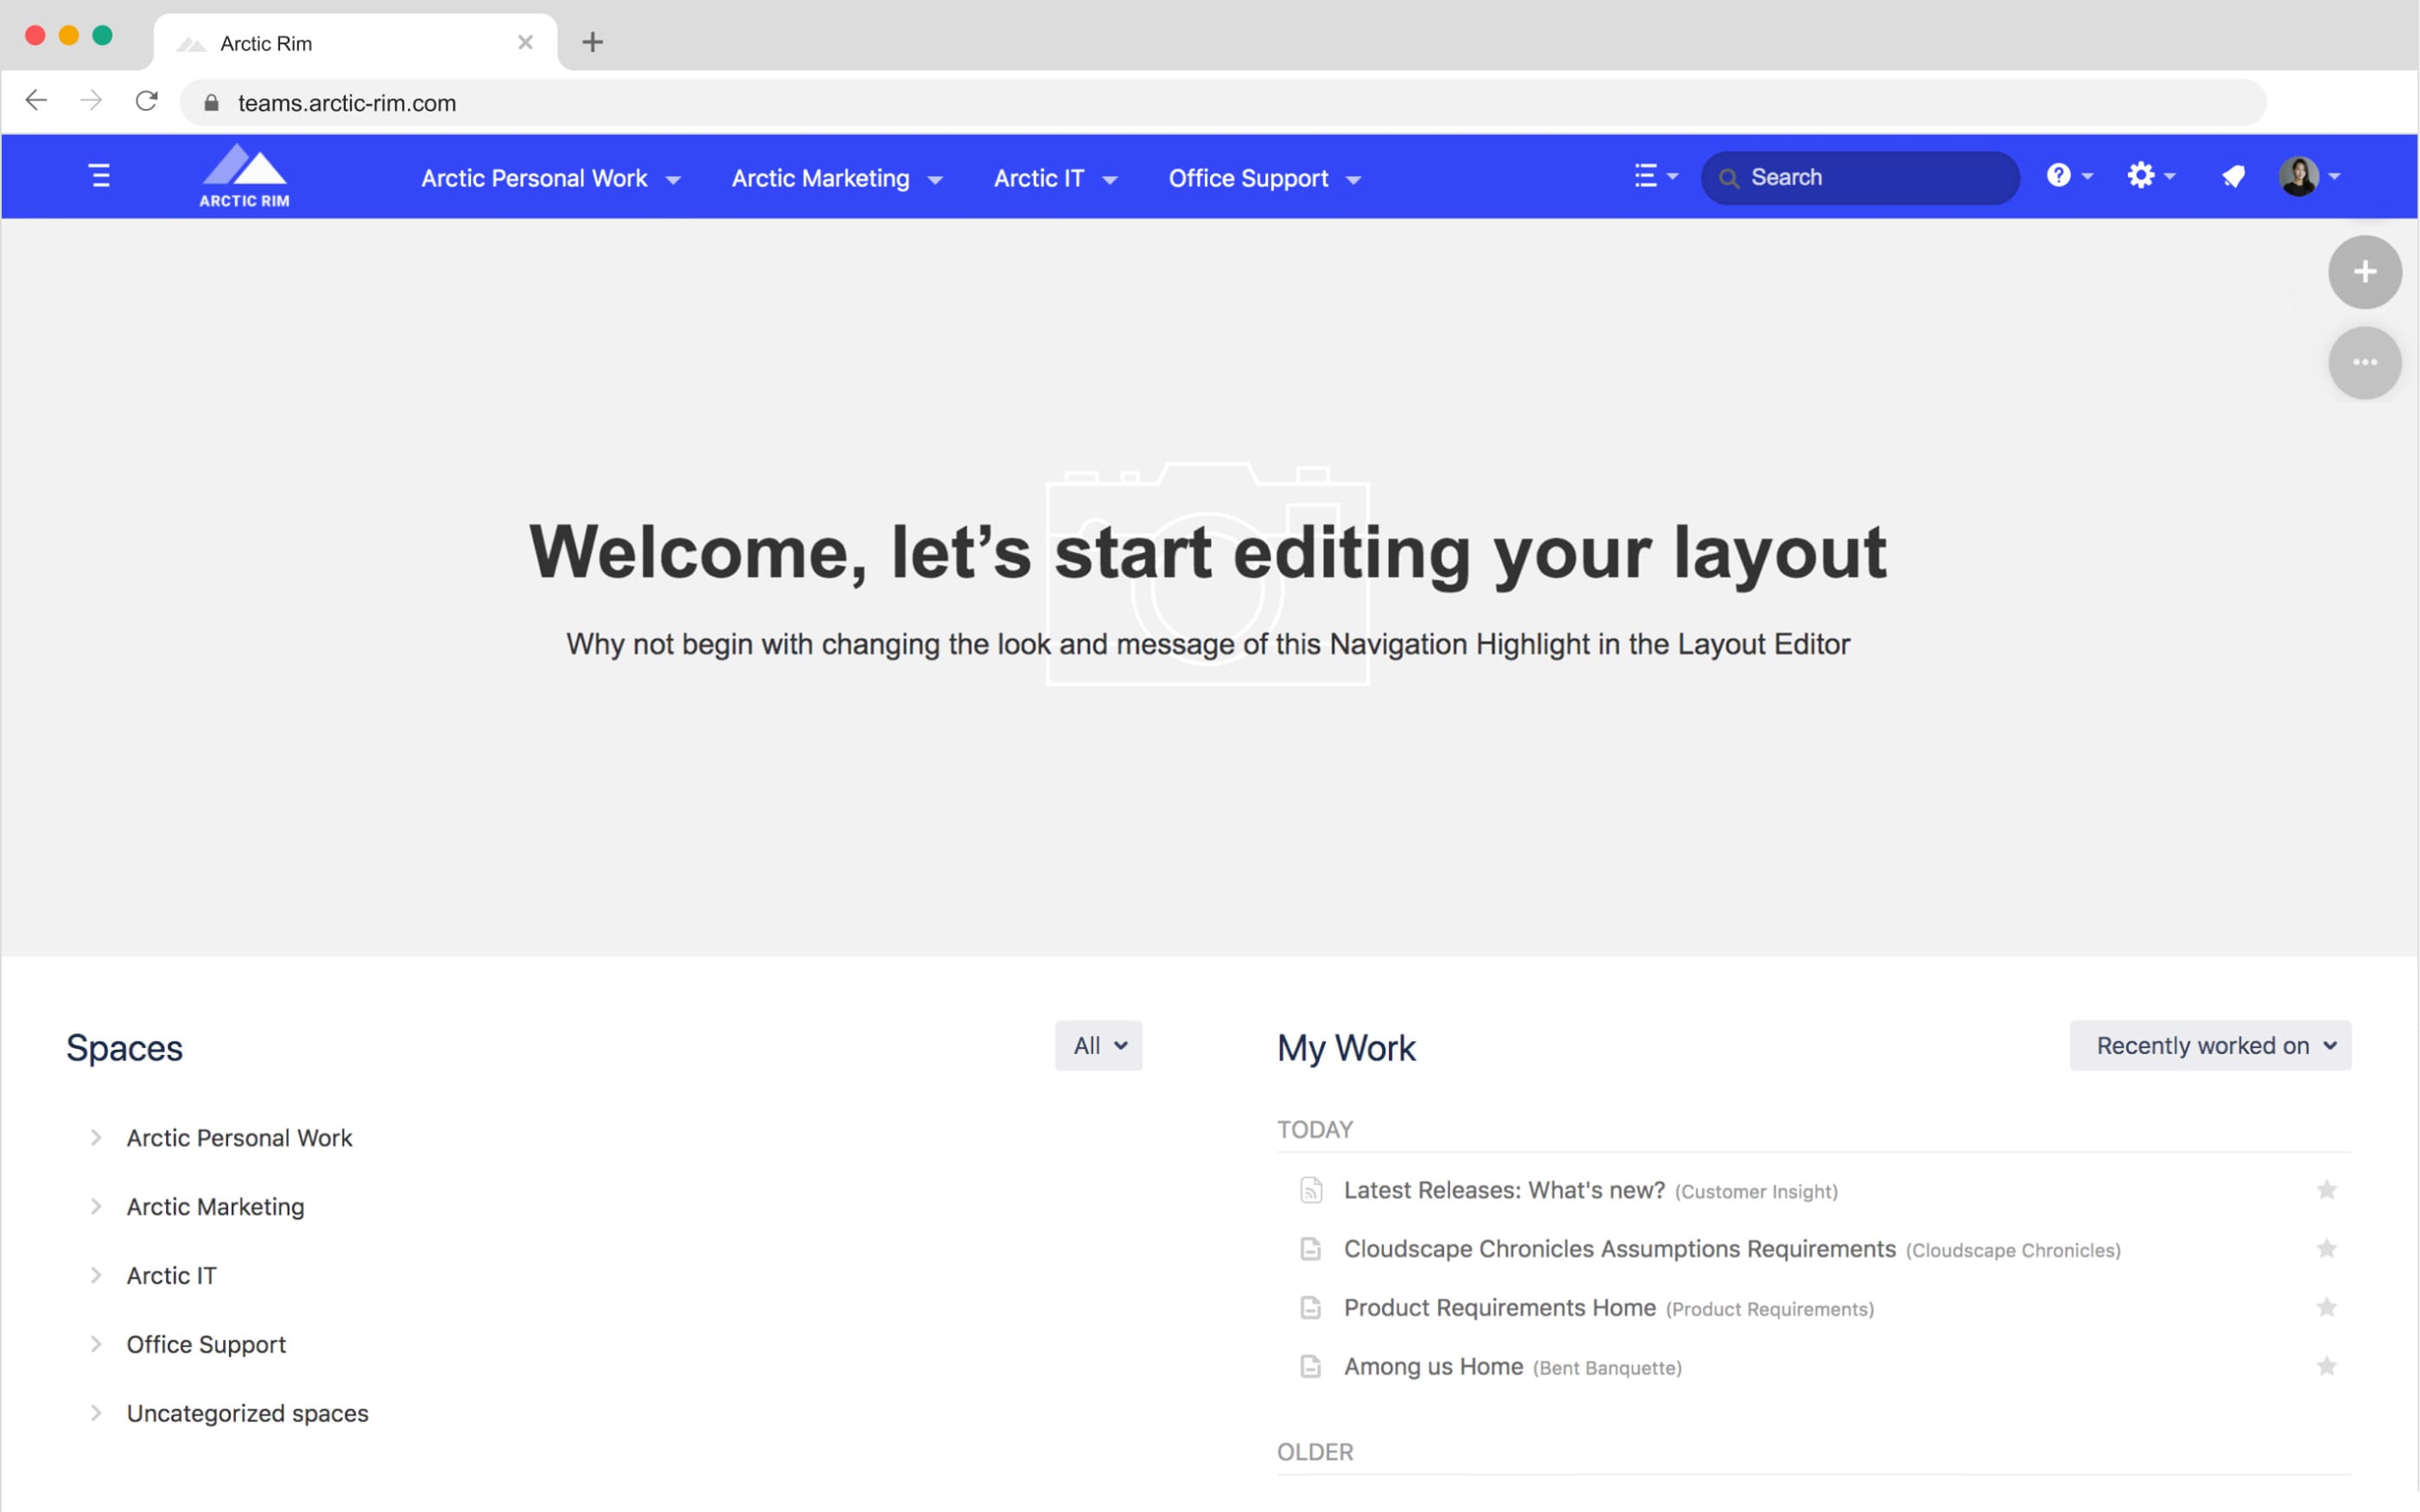
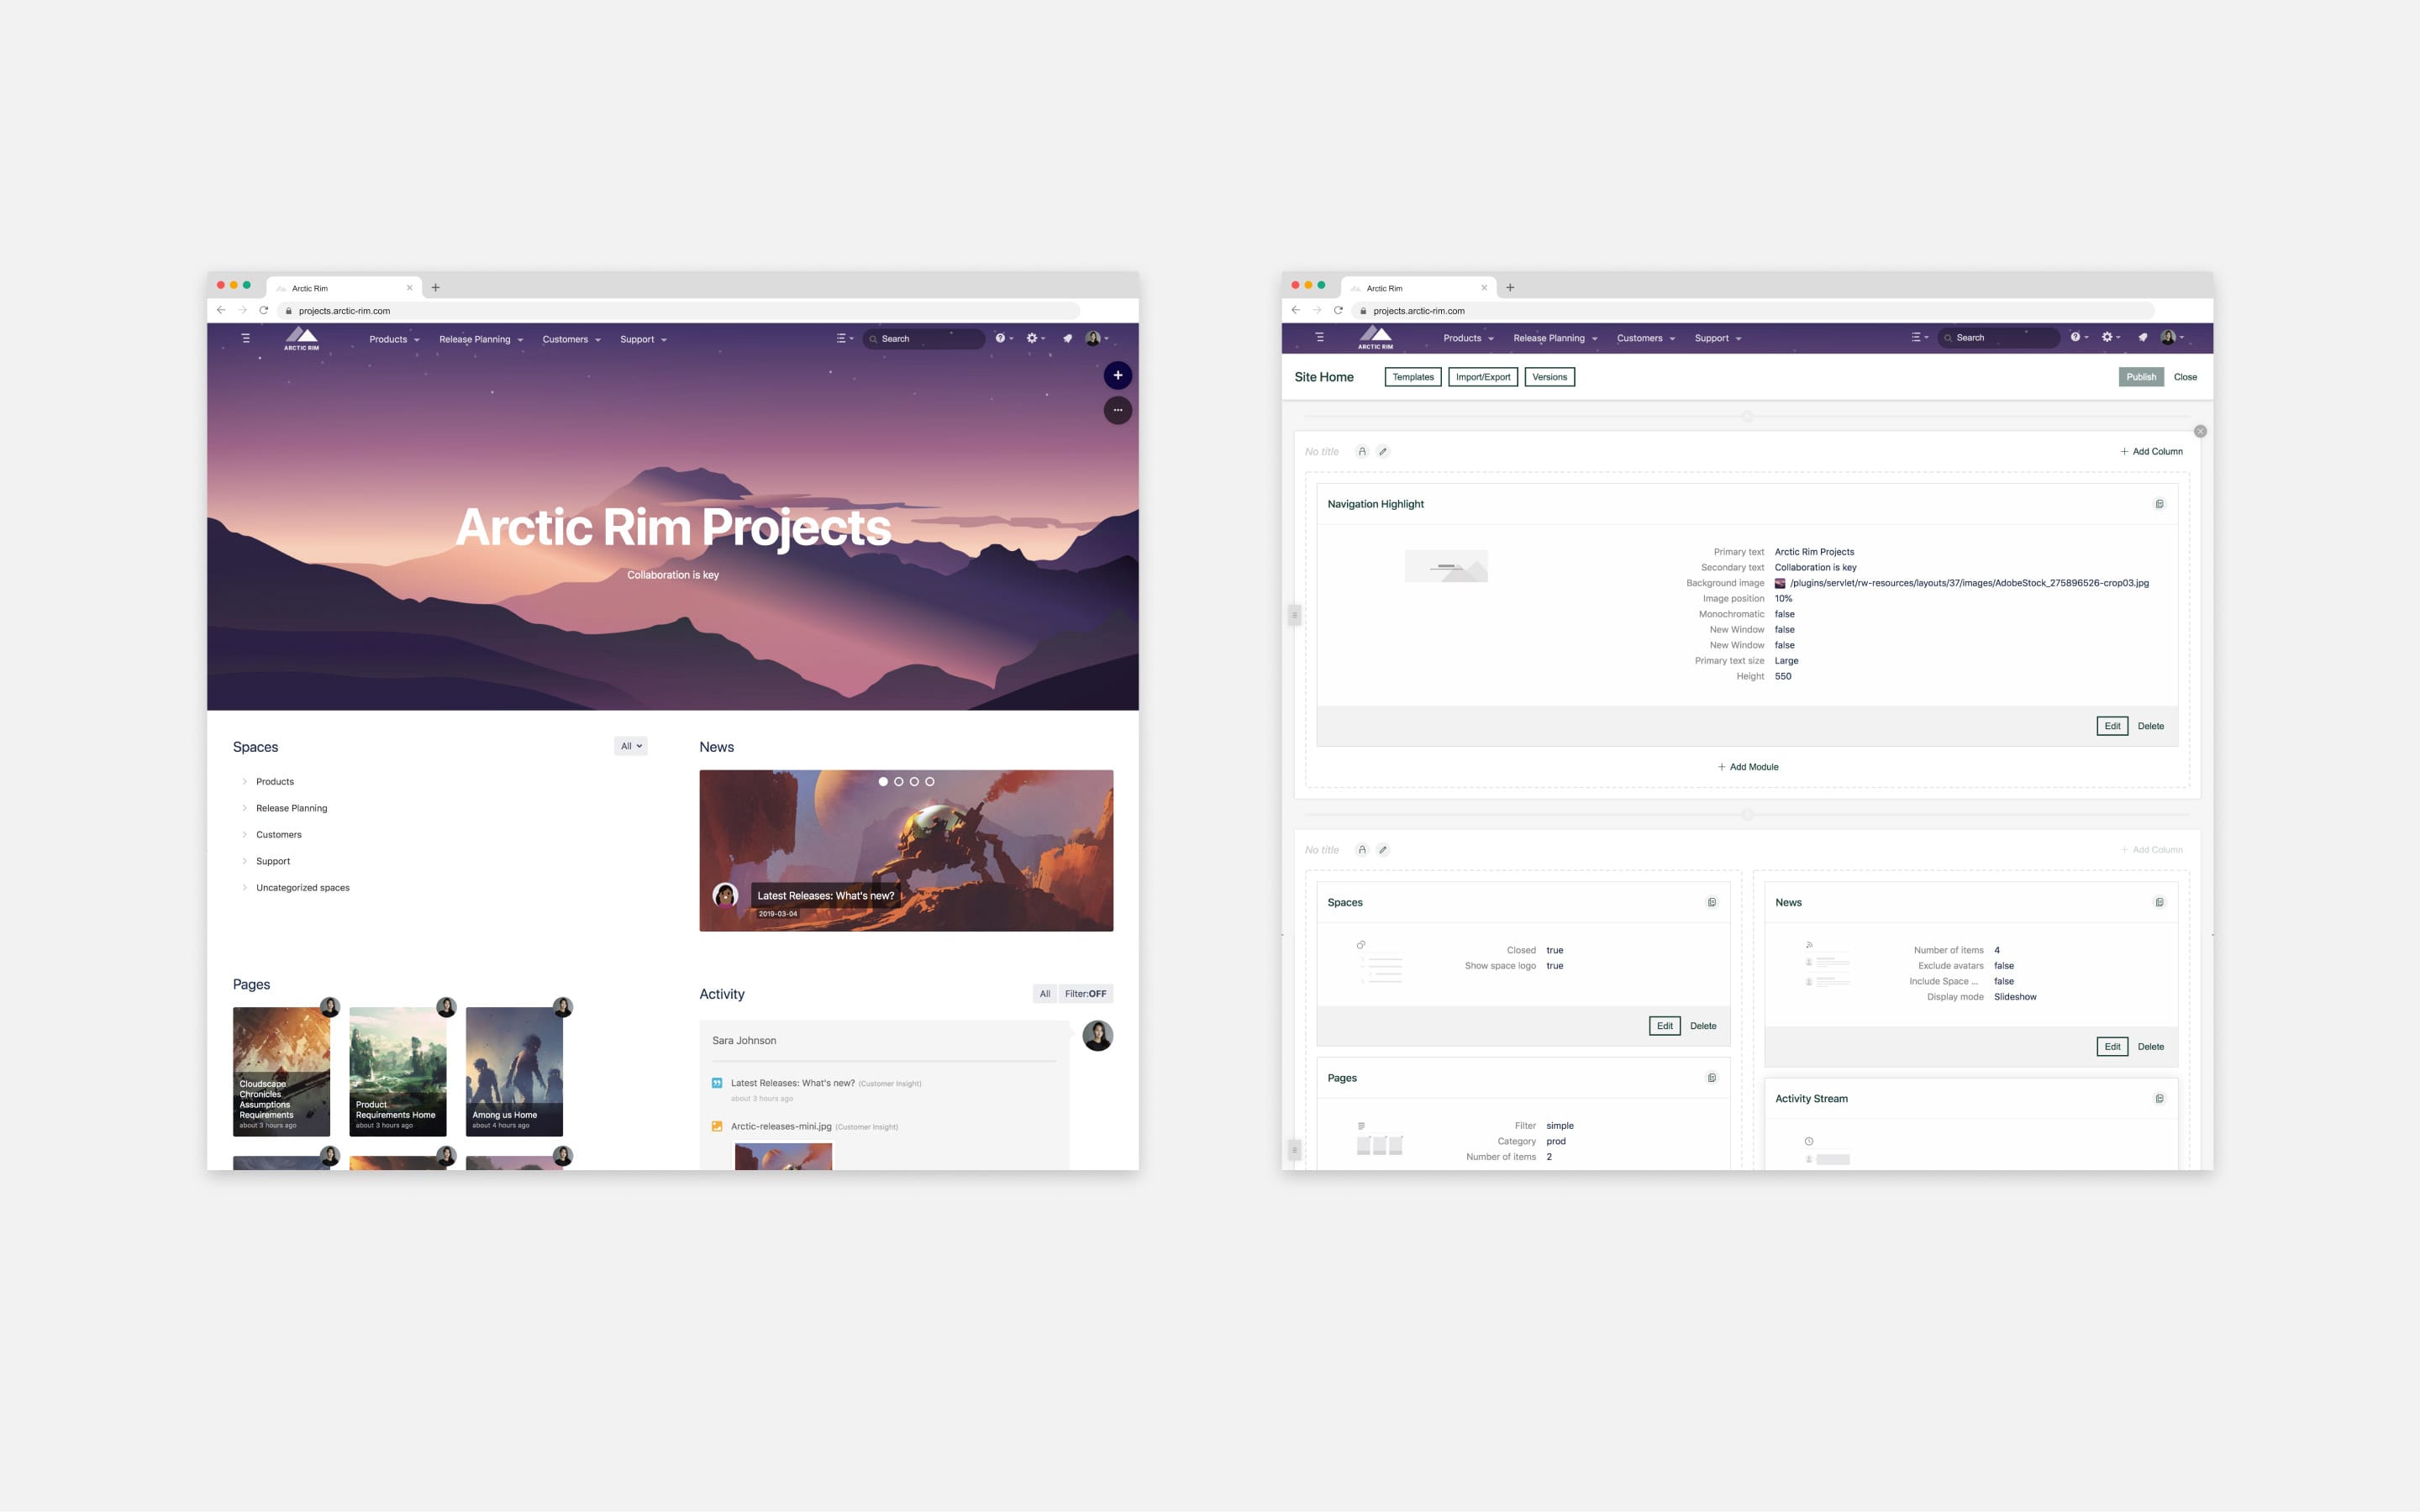
This is the fun part. With Refined out-of-the-box your site will look something like the following:
Use the built-in Themes to change the style and colors of your site. Themes can be applied individually to spaces, categories and sites, or you can keep the same global theme across your site like Arctic Rim.
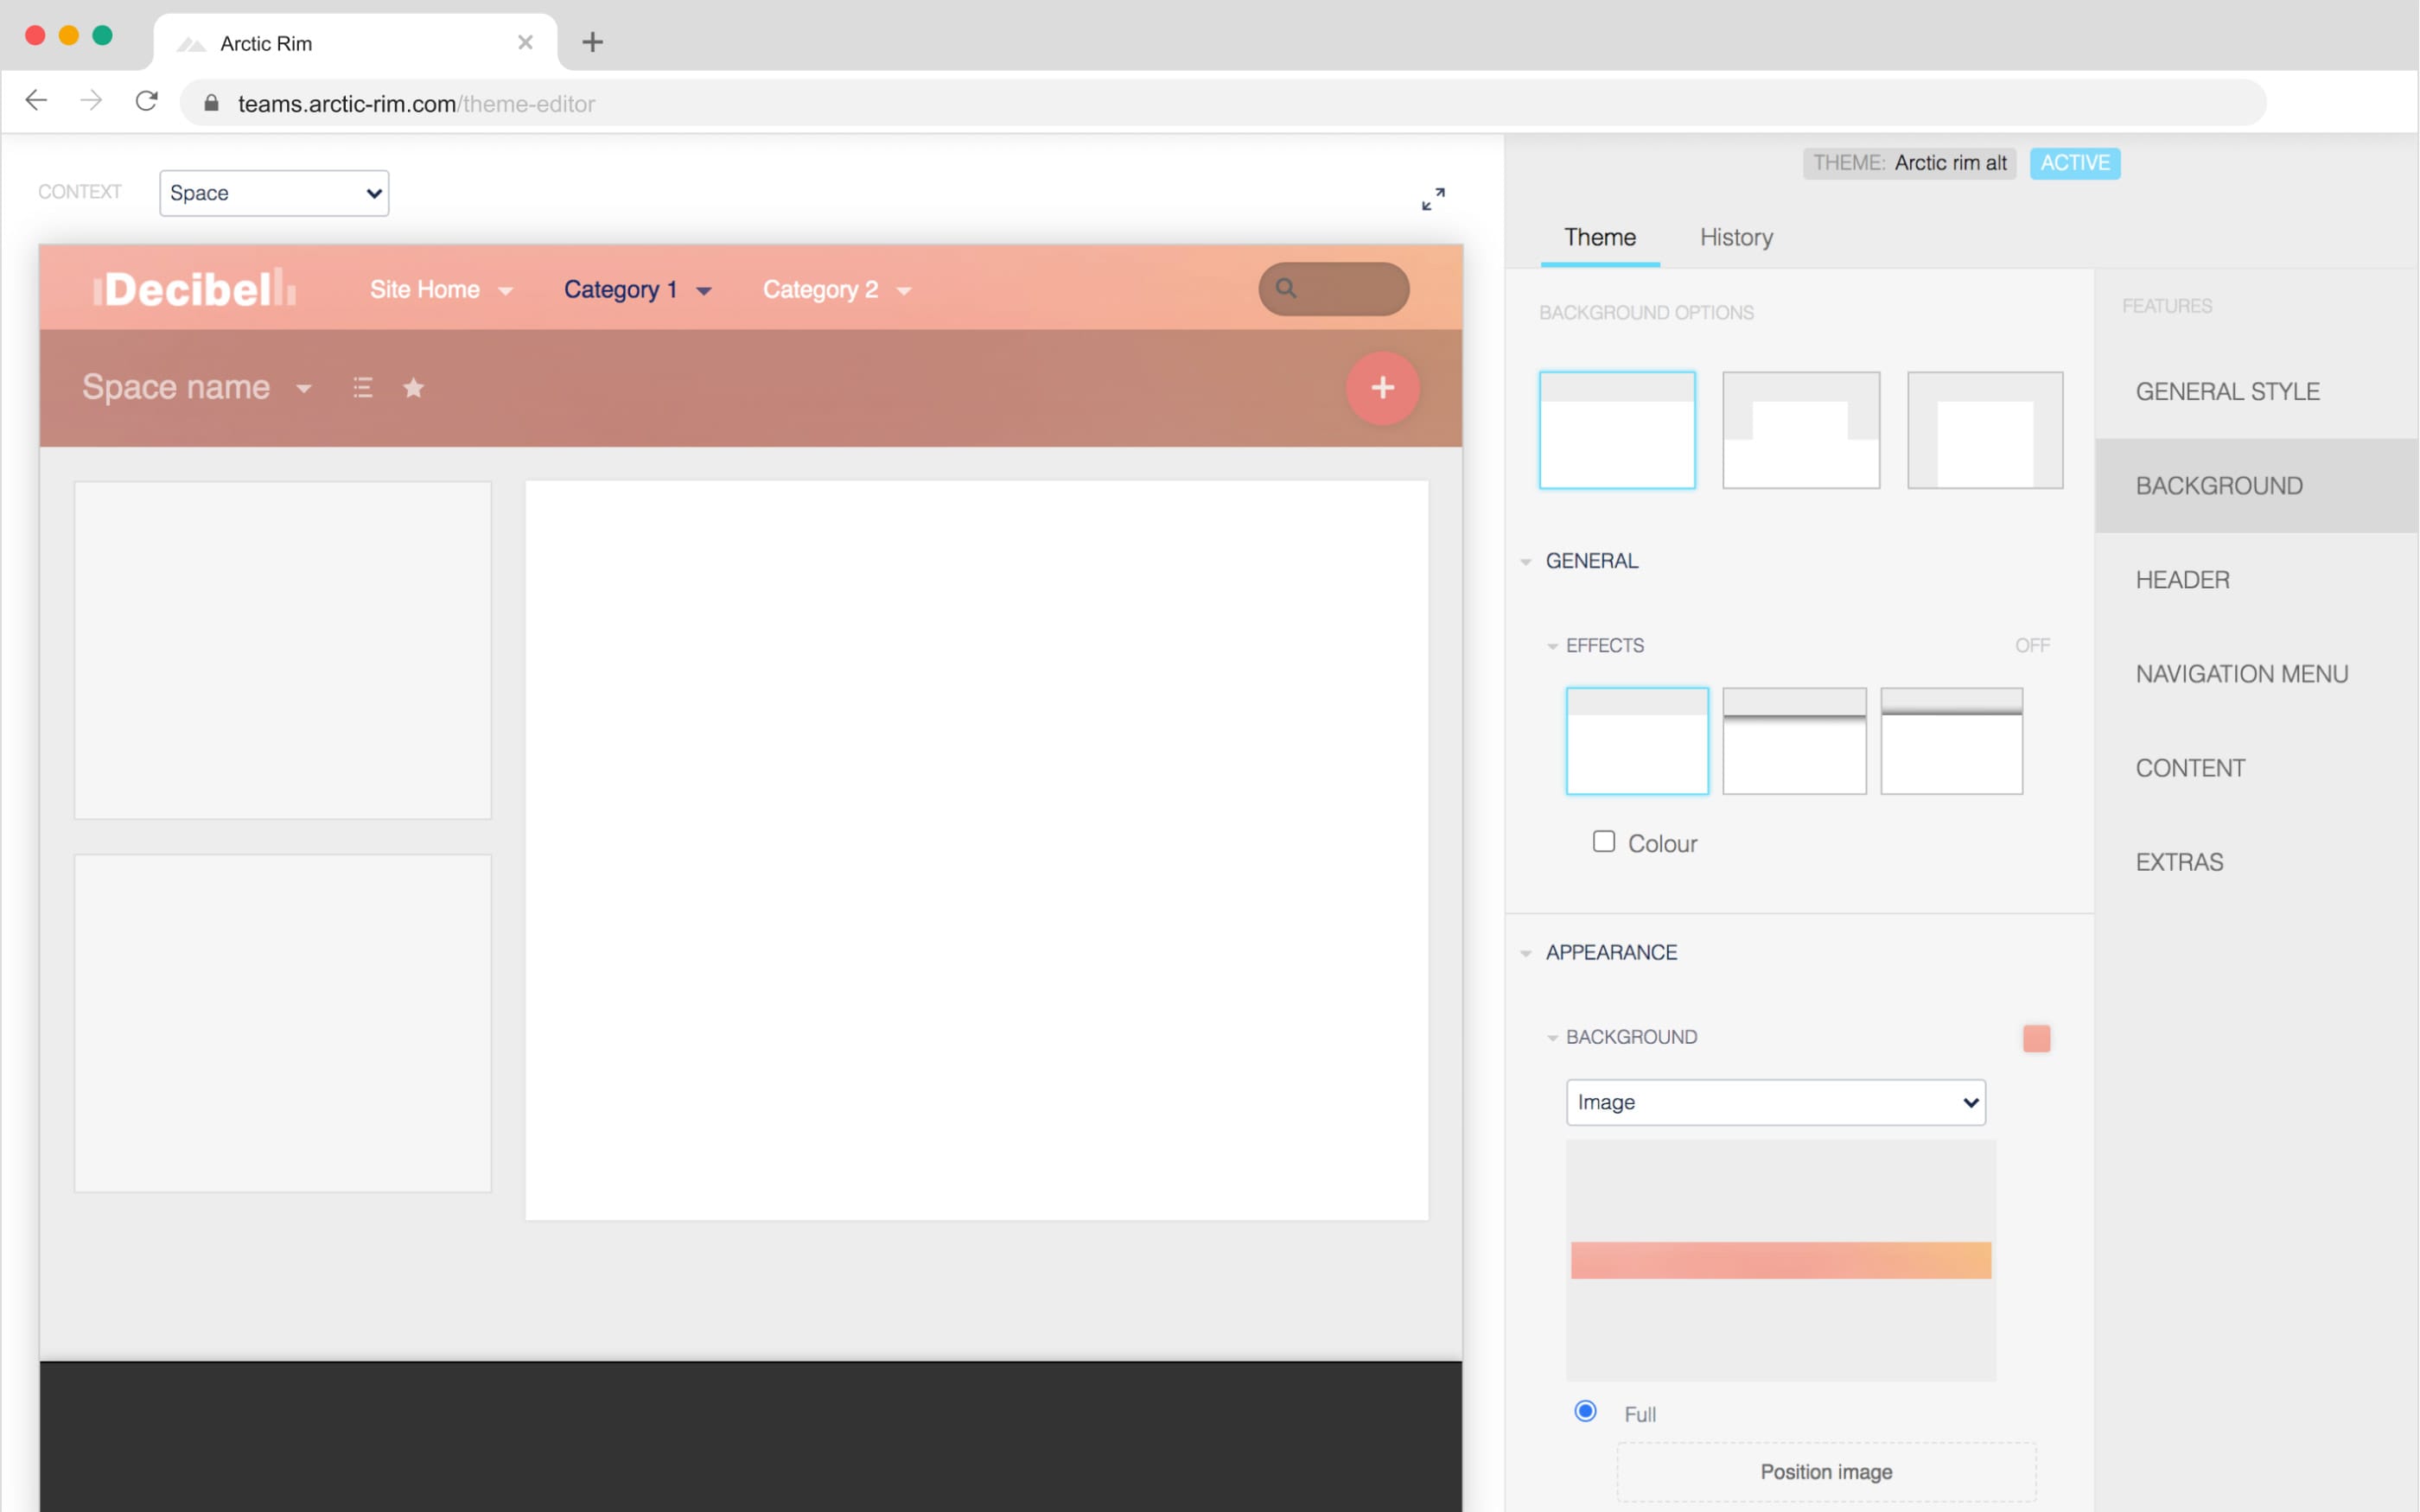
Arctic Rim chose to visually tie the layout of the site home page in with the global theme. Using the Page Builder, they added a hero image using the Site Navigation Module.
Tip: Match the hero image to your theme using the navigation Site navigation module in the Page Builder.
Recap:
Use the Page Builder to design site, category and space homepages, displaying the most important or highest-traffic content prominently on the page. Access step-by-step instructions to design kickass homepages here.
Tip: Use navigation modules for content you want users to have immediate access to. These are prominent, one-click links with an accompanying icon or photo and a short description.
Here’s how Arctic Rim built their Confluence site home layout:

Here’s how Arctic Rim built their product category home layout:
Recap:
There are three easy ways to personalize Confluence: view permissions, start sites and text variables.
Recap:
Try Refined for free for 30 days.
Some features mentioned in this post are available only on Refined for Confluence Sever and Data Center. Compare Refined Sites for Confluence and Server/Data Center here.